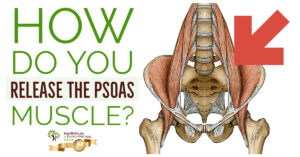
What are the symptoms of a tight psoas muscle?
Many of you have a tight psoas that has been identified in the office may even have an exercise in your exercise booklet that tells you how to stretch to one side or the other. If you are not sure you’re being effective with the stretch or you have a gut feeling that your other side might need to be stretched, there is a way to check your psoas at home.
Catherine is going to help demonstrate the technique. First she is going to close her eyes and make sure her body is evenly lined up, making sure that one foot or shoulder are not forward or that she is rocking on one hip. Once she is squared away and while keeping her focus on the shoulder rather than on the hand, she’s going to raise her hands up above her head to where they meet.
With this we can identify if one hand is shorter than the other. For Catherine her left arm where her hands meet is around an inch shorter than the right. This indicates that the left psoas muscle needs to be stretched. You can stretch that muscle the way that you normally would and then check again afterwards. If the stretch has been effective, you can expect the arms to be equal. Now that you have identified which side is tight by doing the overhand psoas test or you’ve been assigned a psoas stretch from your exercise booklet here at HealthWorks, here are some tips on how to get a good psoas stretch as well as a few things to avoid.
How do you loosen a tight psoas muscle?
First we are going to go through the correct way to do the stretch and Catherine’s going to help us. We previously identified that Catherine has a left tight psoas. She made sure that her hips and her shoulders were square in line with the chair in front of her. A lot of people have success doing this stretch on the edge of a bathtub or a stair as well. Catherine is going to raise her right leg up while making sure that she’s keeping her hips square. She is going to stand up really straight and then going to squeeze her glutes together so that her hip pops forward. It’s a very subtle movement so you might not be able to see it, but at home you do want to practice just squeezing your glutes so that your hip rocks forward. By doing that it puts the psoas in perfect position for when you go into the stretch to help it start stretching immediately.
From this position, she is going to start stretching forward and you should be able to feel a stretch. If you can’t feel the stretch, you probably haven’t done the hip tuck part properly. Come back out of the stretch and practice that again if you feel like you have to go really far. Even the most limber people only need to stretch a little bit forward if they have done the set up correctly.
There are a couple of common things that people do wrong with this stretch. The first one being that they will start to arch their back. By arching your back, you hurt your low back. Make sure your torso is very straight to prevent arching of the back during this stretch. One other thing people tend to do wrong is twisting. Twisting and putting one hip forward can cause pain, so make sure to stay square and lined up. You do want to make sure that the bottom foot is straight ahead. People tend to have their toe pointed out, but you want to make sure your toes and feet are both pointing straight ahead. If your toes aren’t pointing in the right direction, it is not likely to hurt you but the stretch wont be very effective.
If you have any questions about this stretch, please make sure to ask us in the office. This stretch is important to do correctly and can make a big difference in the amount of pain that you’re feeling in your hips and low back.
To watch the full video, click here.

